
This website is for users aged 21 and over. Please confirm your age.

How much does a gram of marijuana shatter cost? Typically, buyers are uneducated about what they are paying for. A gram of shatter can cost anywhere from $50-$150, depending on the purity and potency. If it is lower quality or not a good batch, you could be paying anywhere from $60-$90 to get high. This can fluctuate based on where you live and whom you are buying from.
A gram of high-quality medical marijuana bud/leaves runs $30-$35, considered top quality in the dispensaries. And many people can only smoke or vaporize up to one gram per day, whereas shatter is more concentrated. Therefore you may need less product to get high. Consequently, it is not uncommon to find shatter for sale at $80+ per gram or even $150+.
If you are smoking a joint and using top-shelf “brick weed,” as some call it, that costs $40 per gram. You could pay almost three times the amount for less than half of the THC. That is an example of how expensive it can be to buy marijuana. However, you get what you pay for in the end.
For a $100 investment, buying Medical Cannabis products from a reputable dispensary is a great deal. Per gram, marijuana shatter cost is the going rate. Likewise, treating your medical condition with prescription medications can cost you thousands. Sometimes tens of thousands of dollars per year.
I will explain how to make your Cannabis products for about $50-$100 per pound at home. Based on where you live in the United States, working out the cost per month is the key. Understanding the gram marijuana shatter cost and what is legally allowed is also essential. This is how to save a lot of money if you grow your medical marijuana plants. And you are making the concentrates needed for treating your condition.
If you do not have the proper knowledge for your marijuana DIY- Do-It-Yourself project, this is a recipe for disaster. And it is possibly destroying your home. However, Gram marijuana shatter Cost is straightforward to make with simple preparation and precaution. This guide will cover everything from choosing the right cannabis strain that produces high THC levels. And step by step methods of how to make it.
This guide does not teach you how to grow medical marijuana. It teaches you the best time to make shatter at the right time of harvesting your marijuana. If this is the first time increasing or making solvent-less hash at home, I recommend visiting an experienced Cannabis growers forum. ICMag is the best at guiding you through these threads: “A Beginner’s Guide to Growing Medical Marijuana Indoors” and “How to Make Hash.”
The main ingredient needed for making marijuana oil is Rosin Tech or Pure BHO. This solvent-less hash can cost anywhere from $30-$50 per gram. This depends on the quality product you want and where to purchase it. It also depends on where you live in the United States. Rosin Tech uses a hair straightener to extract trichomes from buds/leaves. After which, it is purified by heat or alcohol. This will be discussed further in this guide.
Ensure your buds/leaves are not wet before you put them into the freezer, or they will mold and rot. If the material is frozen, it’s easier to grind up. Let it thaw first because you don’t want to expose too hot temperatures to your plant material. I recommend using a food processor or blender to produce a better yield. If you don’t have one, chop up the buds and leaves with scissors or a knife until it is about 1″ long in size.
Once your buds/leaves are dry and chopped up, put them in a food processor or blender. Give it about 2 minutes to grind up the material into a fine powder (this will help increase your yield).
Now that you have ground up your material, it’s time to put it into a glass mason jar. Put enough plant material into the pot so that there are about an inch and a half or two inches of space. This is between the top of your buds/leaves and the top of the jar.
You must set up your machine correctly. Any pressure build-up in the system will blow up and cause serious injury to yourself or those around you. Don’t try this method at home if you are careless!
There are different setups for these machines, but I have found that using a bucket with a spout is the easiest. Put some filter or mesh screen at the bottom.
Then I put another bucket/funnel on top of that, so there’s no pressure build-up in the system (you can see this setup in picture 2). It’s important to remember to use a bucket that you are okay with getting oil in because it will get messy!
If you don’t have a bucket/funnel set up and want to do the simplest method of all, just put your jar on top of the hole at the end of your machine so there is space between them. However, this method can be dangerous if you don’t have a lot of space between the top of your jar and the hole at the end of your machine because there could be a pressure build-up in that area.
Now that we’ve set up our extraction machine correctly, it’s time to start cooking our oil!
The cooking process will be done by putting your machine on top of a bucket with about an inch and a half or two inches of water in it so that there is not much pressure build-up at the end of the extraction tube, but just enough to keep it wet. Make sure the pump isn’t going to dry out from not being on top of the water because this could cause it to blow up and injure you.
Make sure your machine is set so that it won’t shut off if the temperature gets too hot, or you will lose a lot of material! A good rule of thumb in general for extraction machines is that if the temperature exceeds 230 F, then it’s better to turn it off than risk losing your material.
It may take a while for everything in your jar to extract into the solvent, so just let it run overnight and check on it in the morning! If you want to speed up the process, increase the temperature of both your solvent bath and the mason jar to run at about 100 F (be careful if you do this).
IMPORTANT: Make space for your solvent in a bucket/funnel as I did in picture 1. Don’t set up the machine and go to sleep because if there is too much pressure build-up at the end of the extraction tube, it will blow up and cause injury. Instead, put your machine on top of a bucket that has an inch and a half or two inches of water in it, so there is no pressure build-up.
After running the extraction process, it’s time to do a final filtration to get all the material out of your oil. I’ve found the easiest way to use a coffee filter and put it between two jars (pictured).
Then pour your solvent into the top jar and allow it to slowly drip through the coffee filter and into the bottom pot. Make sure you do this over a sink or container because there will be some overflow!
If you are worried about your solvent getting on surfaces, just put a funnel in the top jar so that it doesn’t overflow while you pour the solvent from one pot to another. If you want to get the last bits of oil out, you can also put another coffee filter on your solvent and then pour it back into the first jar over and over again until you are satisfied with how much material has been filtered out.
Now that we’ve finished our extraction process, you’ll probably see that we have a little bit of oil left over at the bottom. There might also be some active green material, THCV/CBG, and THCA/CBDA decarbed.
I press my Solvent Butter into a silicone candy mold to separate the oil from the material to filter this out of our oil. I also put some parchment paper on it to be easily removed (pictured).
You can use any mold or silicon mold to shape your “solvent butter” into anything you want! I have a cleanup tool, just a cheap dollar-store spatula with a long handle for easy pressing (pictured). I’ve also heard that using the back of a spoon will work as a substitute.
Some people don’t like this method because it can be challenging to remove all of the material of your oil, and some say they would rather throw their oil away after each extraction due to things getting stuck in it from the filter.
I believe that you can press the oil into a jar, and you’ll still be able to use it (with most of the material filtered out). However, if you do this, there will always be residual plant matter in your oil, which won’t hurt anything, but it might not taste perfect.
To ensure that you get all the material out of your oil, it’s best to use a coffee filter. The only downside is that it can be a very long process and hard on your hands after pressing so many times!
Some would call this extra work taking us off task from maximizing the THC content of our oil/marijuana. Still, making oil for medical purposes is essential to have as little plant matter in your product as possible.
Now that you made it this far through my tutorial, you deserve a nice treat! Here is some high purity decarbed cannabidiol (CBD) isolate that I made using a different method than the one described above.
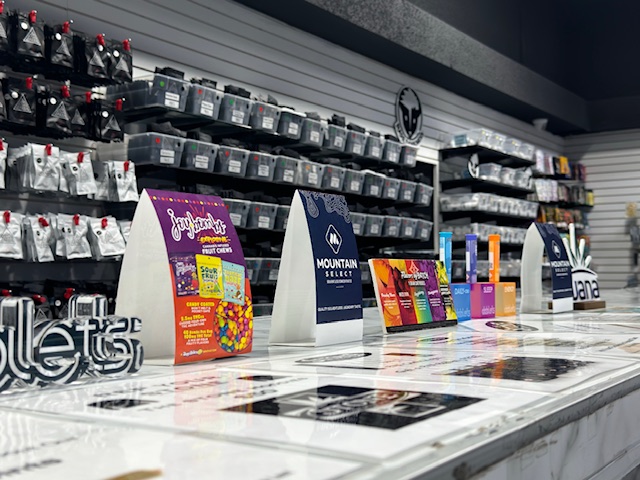
As Denver dispensaries continue to develop, so do their products. Shatter comes in many different forms and can be taken in many ways. It is a good example of Denver dispensaries changing with the market, and it will be interesting to see what Denver dispensaries come out with next.
I hope you enjoyed this guide and if you have any questions or comments about anything, feel free to leave them below! Vape on, friends!


A hit of marijuana can vary in size and weight. And if you roll your own, it’s hard to estimate how many milligrams are contained in any given joint. Even among those who do weigh their pot before hitting it, the effects on the brain may make it tricky to judge accurately how much they’ve smoked or vaped after each hit.
One way to get around the difficulty is to smoke or vape shatter, a marijuana concentrate created by extracting THC and other cannabinoids from the plant with butane. This allows for better control over the size of every hit. But no matter how small a fraction you carefully remove from a piece of shatter, it will always contain a little more THC than there was before, which means you can more precisely calculate how much it costs to get as high as you want.
As a result, people with a high tolerance for – meaning they need larger amounts of – marijuana turn to shatter whenever they want to know exactly how much money they’re going to spend and how baked they’ll be after a session. Shatter is the most potent form of marijuana, meaning its effects are far more intense than smoking weed in flower form. It’s also incredibly easy to consume because it can be smoked on the go.
Shatter is also becoming increasingly popular among those who want to know how much THC they’re inhaling during a session. This could be for academic or medical reasons, or simply to minimize the amount of weed they consume for personal reasons.
NOTE: The original question is at the top. This will serve as a conclusion with further knowledge regarding denver dispensaries and shatter.
We warmly welcome you to explore our highly acclaimed strains, concentrates, and edibles. Serving recreational clients with pride is our passion.
At our dispensary, you'll find a professional yet inviting atmosphere that prioritizes your comfort and privacy. Feel free to stop by at your earliest convenience to experience it for yourself. We can't wait to serve you!